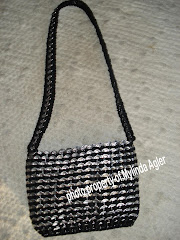
This purse finished 8" wide by 6" tall, It's the perfect size for an evening bag. The purse is 13 tabs high by 30 tab rows around.
Once you get the body of the bag crocheted you will have basically a big circle of tags with an opening at the top and bottom.
Bring one end tog together and begin crocheting tabs along one side. 2SC in each tab hole.
I put on 13 tabs across the bottom of my purse. If you want the bottom of your purse to be a little wider, now is the time to add 1 or 2 more tabs across the bottom. Mine purse is about 1 1/2 inches smaller at the bottom than the opening at the top.
Once I crochet 13 tabs along one side, I did 2 SC in each hole of the tab at the end. This allows you to turn the corner and crochet the other side of the tab to the other side of the purse. see photo.
I only have one single row of tabs on the bottom of my purse.
After I got the row of tabs on I had to do something to hole the tabs together I just came along the center of the tabs and did a single crochet to hold everthing together. I did not put a lining in my purse.
Next you need crocheted on a handle. Begin by tieing your yarn on one side of your purse, where you want your handle to be. Crochet a single row of tabs for your handle. 2 sc in each tab hole along side adding tabs as you go. My handle is 59 tabs long. When you have the handle as long as you want it to be then crochet to the other side of your purse. Finish by crocheting down the other side of the handle. Your handle will look like the picture below when it is finished.
Your purse handle will look like the picture above when it's completely finished.


